Command-line deploy vCenter appliance (VCSA) 6.0 on a Linux machine

Up to version 5.5 a vCenter appliance was usually deployed by importing the corresponding ovf template that could be downloaded from the VMware website. That process changed with version 6.0 since there is no longer an ovf template. Instead, VMWare provides and ISO image that contains the necessary data and tools to deploy a vCenter appliance, even directly from the command line.

After downloading the ISO image file from the my vmware portal mount it, e.g. to /mnt

# mount -o loop /var/lib/libvirt/images/VMware-VCSA-all-6.0.0-3343019.iso /mnt/

The vcsa command line deployment tool can be found at vcsa-cli-installer/lin64/vcsa-deploy. Since the available options and arguments to this tool are tucked away in one of the many vCenter documentation pdfs, here’s the output of vcsa-deploy --help

$ vcsa-cli-installer/lin64/vcsa-deploy --help
usage: vcsa-deploy install [-h] [--template-help] [-v] [-t]
                           [--log-dir LOG_DIR] [--verify-only]
                           [--skip-ovftool-verification] [--no-esx-ssl-verify]
                           [--sso-ssl-thumbprint SSL-SHA1-THUMBPRINT]
                           [--accept-eula]
                           template

Deploy vCSA to a remote host.

optional arguments:
  -h, --help            Show this help message and exit.

Other Arguments:
  --template-help       Print out the help for template settings.
  -v, --verbose         Debug information will be displayed in the console. If you set this parameter, you cannot set --terse.
  -t, --terse           Only warning and error information will be displayed in the console. If you set this paramter, you cannot set --verbose.
  --log-dir LOG_DIR     Directory for log and other output files.
  --verify-only         Perform only the basic template verification and OVF Tool parameter verification, but do not deploy the vCenter Server Appliance.
  --skip-ovftool-verification
                        Deploy the vCenter Server Appliance directly through OVF Tool without performing parameter verification. Basic template verification will still be performed.
  --no-esx-ssl-verify   Skip the SSL verification for ESXi connections.
  --sso-ssl-thumbprint SSL-SHA1-THUMBPRINT
                        Validates server certificate against the supplied SHA1 thumbprint.
  --accept-eula         Accept the end-user license agreement. This argument is required to deploy the appliance.

Required Arguments:
  template              Path of a JSON file that describes the vCenter Server Appliance deployment procedure.

Use --template-help for a list of template settings.

The exit codes and their meanings are:
0: Command ran successfully.
1: Runtime error.
2: Validation error.

You can find sample json templates for the deployment in vcsa-cli-installer/templates/install/. The options should be quite self-explanatory and cover

  • Networking
  • SSO
  • System
  • Database
  • Deployment

A comprehensive list of valid parameters of the json file is available as well by invoking vcsa-cli-installer/lin64/vcsa-deploy --template -h

The deployment.option parameter specifies, how much virtual harware (CPUs, RAM) should be allocated for the vCenter appliance. Here’s a table of the available options (taken from the VMware vSphere 6.0 Documentation Center)

vCenter Server Appliance size

Optionmax. hostsmax. VMsappliance CPUsappliance Memory
tiny1010028 GB
small1001.000416 GB
medium4004.000824 GB
large1.00010.0001632 GB

Note that the hostname parameter in the network section needs to have a forward and reverse DNS entry (see VMware vCenter server 6 deployment guide) to work. An IP address is also fine though.

After editing the json file to reflect your configuration you can deploy the vCenter appliance by running vcsa-cli-installer/lin64/vcsa-deploy path_to_config_file.json --accept-eula

# vcsa-cli-installer/lin64/vcsa-deploy ~/vcenter.json --accept-eula
Performing basic template verification...
Starting vCenter Server Appliance installer to deploy
"vCenter-Server-Appliance"...
This appliance is a vCenter Server instance with an embedded Platform Services
Controller.
See /tmp/vcsaCliInstaller-2016-03-08-15-06-xXUT2j/vcsa-cli-installer.log for the
installer logs.
Run the installer with "-v" or "--verbose" to log detailed information
Running OVF Tool to deploy the OVF...
Opening vCenter Server Appliance image: /mnt/vcsa/vmware-vcsa
Opening VI target: vi://root@esxihost:443/
Deploying to VI: vi://root@esxihost:443/

Progress: 99%
Transfer Completed
Powering on VM: vCenter-Server-Appliance

Progress: 98%
Power On completed.
Waiting for IP address...
Received IP address: 172.30.0.23

Installing services...
vCSA firstboot: Progress: 5% Setting up storage
vCSA firstboot: Progress: 50% Installing RPMs
vCSA firstboot: Progress: 55% Installed
oracle-instantclient11.2-odbc-11.2.0.2.0.x86_64.rpm
vCSA firstboot: Progress: 63% Installed rvc_1.4.0-3196809_x86_64.rpm
vCSA firstboot: Progress: 64% Installed
VMware-rhttpproxy-6.0.0-3339084.x86_64.rpm
vCSA firstboot: Progress: 65% Installed
vmware-certificate-server-6.0.0.2457-3242066.x86_64.rpm
vCSA firstboot: Progress: 66% Installed
vmware-identity-sts-6.0.0.6360-3208448.noarch.rpm
vCSA firstboot: Progress: 67% Installed
VMware-cis-license-6.0.0-3242064.x86_64.rpm
vCSA firstboot: Progress: 70% Installed
vmware-esx-netdumper-6.0.0-0.0.2981910.i386.rpm
vCSA firstboot: Progress: 73% Installed
VMware-Postgres-9.3.9.0-2921310.x86_64.rpm
vCSA firstboot: Progress: 77% Installed
VMware-Postgres-plpython-9.3.9.0-2921310.x86_64.rpm
vCSA firstboot: Progress: 79% Installed
VMware-Postgres-client-jdbc-9.3.9.0-2921310.noarch.rpm
vCSA firstboot: Progress: 80% Installed VMware-invsvc-6.0.0-3242064.x86_64.rpm
vCSA firstboot: Progress: 81% Installed VMware-vpxd-6.0.0-3339084.x86_64.rpm
vCSA firstboot: Progress: 81% Installed
VMware-vpxd-client-6.0.0-3339084.x86_64.rpm
vCSA firstboot: Progress: 83% Installed
VMware-vpxd-vctop-6.0.0-3339084.x86_64.rpm
vCSA firstboot: Progress: 84% Installed
VMware-cloudvm-vimtop-6.0.0-3339084.x86_64.rpm
vCSA firstboot: Progress: 85% Installed ipxe-1.0.0-1.2882051.vmw.i686.rpm
vCSA firstboot: Progress: 86% Installed
vmware-autodeploy-6.0.0-0.0.3253919.noarch.rpm
vCSA firstboot: Progress: 86% Installed VMware-sps-6.0.0-3339084.x86_64.rpm
vCSA firstboot: Progress: 87% Installed VMware-vdcs-6.0.0-3242353.x86_64.rpm
vCSA firstboot: Progress: 89% Installed
VMware-vsanmgmt-6.0.0-0.1.3339084.x86_64.rpm
vCSA firstboot: Progress: 90% Installed vmware-vsm-6.0.0-3339084.x86_64.rpm
vCSA firstboot: Progress: 90% Installed vsphere-client-6.0.0-3338001.noarch.rpm
vCSA firstboot: Progress: 91% Installed
VMware-perfcharts-6.0.0-3339084.x86_64.rpm
vCSA firstboot: Progress: 95% Configuring the machine
Services installations succeeded.
Configuring services for first time use...
vCSA firstboot: Progress: 3% Starting VMware Authentication Framework...
vCSA firstboot: Progress: 10% Starting VMware Identity Management Service...
vCSA firstboot: Progress: 17% Starting VMware Component Manager...
vCSA firstboot: Progress: 20% Starting VMware License Service...
vCSA firstboot: Progress: 24% Starting VMware Platform Services Controller
Client...
vCSA firstboot: Progress: 27% Starting VMware Service Control Agent...
vCSA firstboot: Progress: 31% Starting VMware vAPI Endpoint...
vCSA firstboot: Progress: 34% Starting VMware System and Hardware Health
Manager...
vCSA firstboot: Progress: 37% Starting VMware Appliance Management Service...
vCSA firstboot: Progress: 44% Starting VMware Common Logging Service...
vCSA firstboot: Progress: 48% Starting VMware Postgres...
vCSA firstboot: Progress: 55% Starting VMware Inventory Service...
vCSA firstboot: Progress: 58% Starting VMware Message Bus Configuration
Service...
vCSA firstboot: Progress: 63% Starting VMware vSphere Web Client...
vCSA firstboot: Progress: 64% Starting VMware vSphere Web Client...
vCSA firstboot: Progress: 65% Starting VMware vSphere Web Client...
vCSA firstboot: Progress: 68% Starting VMware ESX Agent Manager...
vCSA firstboot: Progress: 72% Starting VMware vSphere Auto Deploy Waiter...
vCSA firstboot: Progress: 75% Starting VMware vSphere Profile-Driven Storage
Service...
vCSA firstboot: Progress: 79% Starting VMware Content Library Service...
vCSA firstboot: Progress: 82% Starting VMware vCenter Workflow Manager...
vCSA firstboot: Progress: 89% Starting VMware vService Manager...
vCSA firstboot: Progress: 93% Starting VMware Performance Charts...
vCSA firstboot: Progress: 96% Starting vsphere-client-postinstall...
First time configuration succeeded.
vCenter Server Appliance installer finished deploying
"vCenter-Server-Appliance".
This appliance is a vCenter Server instance with an embedded Platform Services
Controller.
    System Name: 172.30.0.97
    Log in as: Administrator@vsphere.local
Finished successfully.

You should now be able to long into the vSphere Web Client with Administrator@vsphere.local as username and the password you specified in the json file
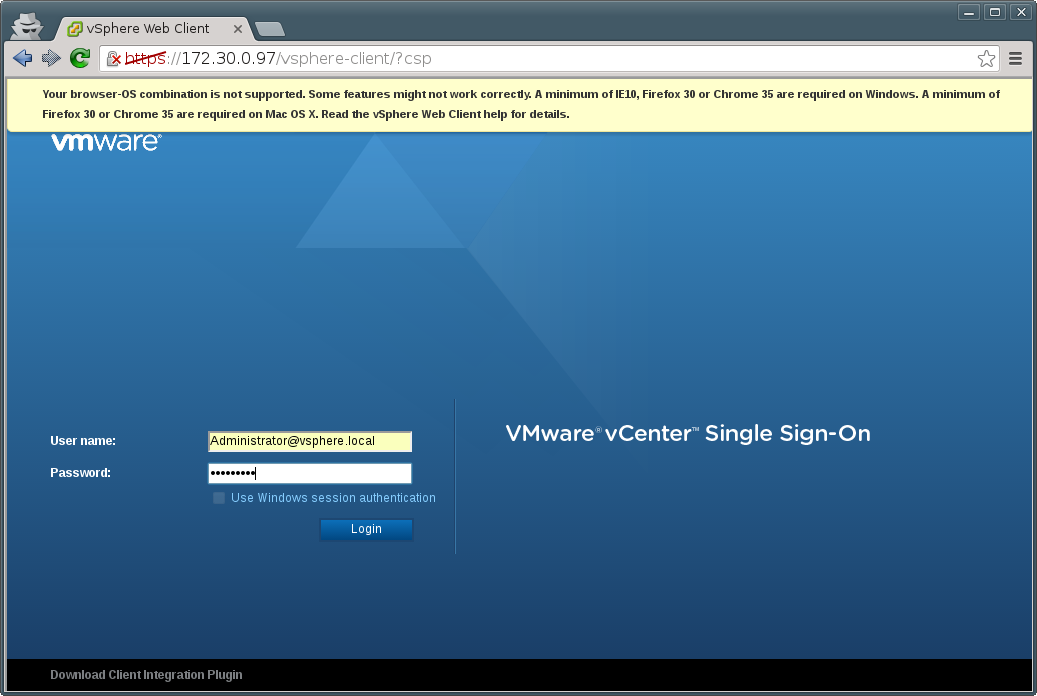
vSphere Web Client

You can safely ignore the warning about the browser-OS combination.

Tunneling browser traffic through an ssh jumpbox

It can be very handy sometimes to tunnel your browser’s traffic through a secure channel, for example when you are on an insecure or unknown network like a hotel, cafe or airport etc.

To open up a SOCKS proxy on port 8080, run

ssh -C2qTnN -D 8080 your-user@example.com

To configure Firefox to use the proxy go to Edit → Preferences → Advanced → Network → Settings and enable ‘Manual proxy configuration’

Edit → Preferences → Advanced → Network → Settings

Enable SOCKS proxy in Edit → Preferences → Advanced → Network → Settings

You can also tunnel Firefox’s DNS queries through the SOCKS proxy by enabling the ‘Remote DNS’ checkbox.

For chrome, you can use the settings dialog quite similar to the Firefox example above, but you can also specify the proxy through the command line with the SOCKS_SERVER environment variable. To spawn a new, temporary chrome session with the SOCKS proxy configured, run

SOCKS_SERVER=localhost:8080 google-chrome --user-data-dir=/tmp/chrome $1

Note that’s it’s a bit more tricky to tell chrome not to rely on local DNS queries. For details have a look at the chromium documentation.

Resources:
https://news.ycombinator.com/item?id=1536126

Creating a local OmniOS repository

      1 Comment on Creating a local OmniOS repository

Sometimes it is a good idea or even necessary to have a local mirror of OmniOS available, i.e. if you do not want to allow your severs direct access to the outside world. Setting up a local OmniOS repository is rather simple.

1. Create a local package repo

To create an empty repo, run pkgrepo:

pkgrepo create /path/to/repo

2. Grab packages from remote repo

To mirror a remote repository to the newly created local repository, you can use:

pkgrecv -s http://pkg.omniti.com/omnios/r151014/ -d /path/to/repo '*'

You could, of course, also restrict it to individual packages or exclude certain packages.

3. Update the local repository

Updating the local repository is essentially the same as downloading it. Re-run pkgrecv and new packages will be fetched. Don’t forget to run refresh on the repo afterwards to catalog any new packages found in the repository and update search indexes:

# pkgrecv -s http://pkg.omniti.com/omnios/r151014/ -d /path/to/repo omnios '*'
# pkgrepo -s /path/to/repo refresh

4. Add the local repository as a publisher

You need to tell your server to use your local repository instead of the upstream one:

# pkg set-publisher -G '*' -g file:///path/to/repo/ omnios

For a more comprehensive documentation of the available options to set-publisher have a look at the ‘Configuring Publishers’ page at Oracle.

5. Refresh publisher metadata and install packages

After refreshing the publisher metadata you are ready to install packages from your local repository

# pkg refresh --full
# pkg install <packagename>

6. A note on mirroring ms.omniti.com

Creating a mirror of ms.omniti.com works the same as any other repository. Be sure, however, to use the -m all-versions flag when downloading the packages into the local repo:

# pkgrepo create /path/to/ms.omniti.com/
# pkgrecv -s http://pkg.omniti.com/omniti-ms/ -d  file:///mnt/rpm-repo/omnios/ms.omniti.com/ -m all-versions '*'

More options to pkgrecv can be found at Oracle’s pkgrecv manpage. To enable the local ms.omniti.com repository on your machine, run

# pkg set-publisher -G '*' -g file:///path/to/ms.omniti.com/ ms.omniti.com

Resources and further reading:
https://blogs.oracle.com/observatory/entry/quick_local_repository
http://serverfault.com/questions/348139/how-to-manually-download-individual-files-from-the-openindiana-or-solaris-pkg

Upgrade OmniOS to r151014

      No Comments on Upgrade OmniOS to r151014

Just a quick memory hook on how to update an OmniOS release…

Update the publisher to point to the new release, r151014 being the release version to update to in this case:

pkg set-publisher -G '*' -g http://pkg.omniti.com/omnios/r151014/ omnios

To update the client’s list of available packages and publisher metadata, run

pkg refresh --full

The actual update process is invoked with

pkg update -v --be-name=omnios-r151014 entire

If you happen to have use zones, the process is a little more sophisticated though.

Resources:
http://omnios.omniti.com/wiki.php/Upgrade_to_r151014
http://lists.omniti.com/pipermail/omnios-discuss/2015-June/005127.html

Pango-WARNING **: failed to choose a font, expect ugly output.

If you try to start a graphical application on a minimal Fedora or CentOS setup, e.g. via ssh -X, you might face the situation that the program actually starts up, but no font appears (or a weird one, or only squares where the letters are supposed to be).

virt-manager on Fedora 21 without the proper fonts installed

virt-manager on Fedora 21 without the proper fonts installed


virt-manager on Fedora 20 without the proper fonts installed

virt-manager on Fedora 20 without the proper fonts installed


Firefox on Fedora 20 without the proper fonts installed

Firefox on Fedora 20 without the proper fonts installed


If you start a program that uses Pango, like firefox, you get at least an error message:

$ firefox 
(firefox:9281): Pango-WARNING **: failed to choose a font, expect ugly output.

The solution is simple. It’s sufficient to install the dejavu fonts package:

# yum install dejavu-sans-fonts.noarch dejavu-serif-fonts.noarch

Resources:
http://stackoverflow.com/questions/2568408/pango-warning-failed-to-choose-a-font-expect-ugly-output

Sharing a screen session with another user

      3 Comments on Sharing a screen session with another user

GNU screen has builtin multiuser support that let’s you share a screen session with another user.

First, create a screen session named with an arbitrary name, e.g. ‘shared’, and attach to it:

[user1@pc ~]$ screen -S shared

To allow other users to use the session, you need to enable multiuser support (Ctrl-a :multiuser on) and add the specific user(s) you want to share your session with to the access control list (Ctrl-a :acladd user2).

If you try to attach to this session with a different user now, you might run into the following problem:

[user2@pc ~]$ screen -x user1/shared
Must run suid root for multiuser support.

To fix this, set the SUID bit on the screen binary:

[root@pc ~]# chmod u+s $(which screen)
[root@pc ~]# chmod 755 /var/run/screen

You also need to change the permissions of the /var/run/screen directory to 755, otherwise screen will complain when you create a new session.

You should be able to connect to the shared screen session now:

[user2@pc ~]$ screen -x user1/shared

If you run into chmod /dev/pts/2: Operation not permitted remember that a user is not able to manipulate the pty he is on when you run su - user (in contrast to using ssh user2@host).

Resources:
http://wiki.networksecuritytoolkit.org/nstwiki/index.php/HowTo_Share_A_Terminal_Session_Using_Screen
https://www.gnu.org/software/screen/manual/screen.html
http://aperiodic.net/screen/multiuser

Running PulseAudio as system service

      2 Comments on Running PulseAudio as system service

Running PulseAudio in system mode is usually a bad idea. There are use cases however, where PulseAudio’s system mode is a great tool, e.g. for building a PulseAudio streaming target to stream audio from multiple clients to speakers.

First, install PulseAudio, avahi (a free implementation of zeroconf) to publish the service throughout the network and the corresponding PulseAudio module:

# yum install pulseaudio pulseaudio-module-zeroconf avahi

Since the use cases of PulseAudio in system mode are limited, distributions usually do not ship a systemd unit for it.

[Unit]
Description=PulseAudio Daemon

[Install]
WantedBy=multi-user.target

[Service]
Type=simple
PrivateTmp=true
ExecStart=/usr/bin/pulseaudio --system --realtime --disallow-exit --no-cpu-limit 

For a list of available options, have a loot at the pulse-daemon manpage.

In Fedora, sound devices (/dev/snd/*) are usually owned by root:audio and since the pulse user who will run PulseAudio daemon later is not part of the audio group per default, it cannot access sound devices. Adding the pulse user to the audio group is simple though

# ls -lah /dev/snd/
total 0
drwxr-xr-x  3 root root      180 Nov 18 09:45 .
drwxr-xr-x 19 root root     3.2K Nov 18 09:45 ..
drwxr-xr-x  2 root root       60 Nov 18 09:45 by-path
crw-rw----  1 root audio 116,  2 Nov 18 09:45 controlC0
crw-rw----  1 root audio 116,  4 Nov 18 11:33 pcmC0D0c
crw-rw----  1 root audio 116,  3 Nov 18 11:29 pcmC0D0p
crw-rw----  1 root audio 116,  5 Nov 18 09:45 pcmC0D1c
crw-rw----  1 root audio 116,  1 Nov 18 09:45 seq
crw-rw----  1 root audio 116, 33 Nov 18 09:45 timer
# usermod -a -G audio pulse

To make PulseAudio available over the network, you have to add a bit of configuration to /etc/pulse/system.pa

[...]
### Enable positioned event sounds
load-module module-position-event-sounds

load-module module-native-protocol-tcp auth-anonymous=1
load-module module-zeroconf-publish

For a list of available module options, consult the PulseAudio module dokumentation, especially module-native-protocol-tcp.
auth-anonymous in particular might be a questionable idea in larger environments. An IP based access control list (auth-ip-acl) or a cookie containing some random data that serves as a shared secret between server and clients (auth-cookie) could be a more feasible approach.

Next, enable and start the PulseAudio server as well as the avahi daemon

# systemctl enable pulseaudio.service 
ln -s '/etc/systemd/system/pulseaudio.service' '/etc/systemd/system/multi-user.target.wants/pulseaudio.service'
# systemctl start pulseaudio.service
# systemctl start avahi-daemon.service

You should be able to see a new service being published through avahi on the client:

[user@PulseClient ~]$ avahi-browse -a
+ enp0s25 IPv4 PulseAudio [46:46:46:46:46:46]                 Workstation          local
+ enp0s25 IPv4 pulse@PulseAudio                               PulseAudio Sound Server local
+ enp0s25 IPv4 pulse@PulseAudio: Built-in Audio Analog Stereo PulseAudio Sound Sink local
+ enp0s25 IPv4 pulse@PulseAudio: Built-in Audio Analog Stereo PulseAudio Sound Source local

You could then go ahead and use paprefs on your client to make remote PulseAudio sound devices available locally:

Use paprefs to make remote sound devices available locally.

Use paprefs to make remote sound devices available locally.

Finally, you might want to enable additional audio channels or change the channel mapping on the server:

[...]
; default-sample-format = s16le
; default-sample-rate = 44100
; alternate-sample-rate = 48000
; default-sample-channels = 2
default-sample-channels = 4
; default-channel-map = front-left,front-right

Don’t forget to restart the PulseAudio server afterwards!

Resources:
https://elehack.net/writings/computing/audio-server

No default route with Fedora’s legacy network service

There’s a bug in Fedora 20 and RHEL 7, where the legacy network service does not set the default route properly. This is due to the fact, that the network service does not evaluate the GATEWAY0 directive in /etc/sysconfig/network-scripts/ifcfg-ethX that is used by NetworkManager.
To set the default route with the legacy network service, simply change GATEWAY0 to GATEWAY:

UUID=57a49f0d-31f9-4b44-9730-4f9778f71521
DNS1=192.168.2.1
BOOTPROTO=none
DEVICE=eth0
ONBOOT=yes
IPV6INIT=yes
HWADDR=46:46:46:46:46:46
TYPE=Ethernet
IPADDR0=192.168.2.180
PREFIX0=24
GATEWAY=192.168.2.1
DEFROUTE=yes
IPV4_FAILURE_FATAL=no
IPV6_AUTOCONF=yes
IPV6_DEFROUTE=yes
IPV6_PEERDNS=yes
IPV6_PEERROUTES=yes
IPV6_FAILURE_FATAL=no
NAME="System eth0"

Of course, you have to set DEFROUTE=yes, too. Note that this is going to be fixed in Fedora 21.

Configuring LACP between OpenIndiana and a Dell Force10 switch

Link aggregation is a method of bundling interfaces together to act as one for increased bandwith and/or failover. One of most used protocols, next to a couple of proprietary ones, for controlling such a channel bond is LACP, the Link Aggregation Control Protocol.

1. Configuring LACP on Dell S4810

Let’s assume, we want to bond two 10G Ethernet ports together, namely TenGigabitEthernet 0/32 and TenGigabitEthernet 0/33

S4810(conf)#interface range tengigabitethernet 0/32 , tengigabitethernet 0/33
S4810(conf-if-range-te-0/32,te-0/33)#port-channel-protocol LACP                                       
S4810(conf-if-range-te-0/32,te-0/33-lacp)#  port-channel 9 mode active                                     
S4810(conf-if-range-te-0/32,te-0/33-lacp)#show conf
!
interface TenGigabitEthernet 0/32
 description po9 uplink to Server47
 no ip address
 flowcontrol rx on tx off 
!  
 port-channel-protocol LACP 
  port-channel 9 mode active 
 no shutdown
!
interface TenGigabitEthernet 0/33
 description po9 uplink to Server47
 no ip address
 flowcontrol rx on tx off 
!  
 port-channel-protocol LACP 
  port-channel 9 mode active 
 no shutdown

Next, the port-channel interface needs to be configured as layer 2 port and activated afterwards:

S4810(conf)#interface port-channel 9
S4810(conf-if-po-9)#description Uplink to Server47
S4810(conf-if-po-9)#switchport 
S4810(conf-if-po-9)#no shutdown 
S4810(conf-if-po-9)#show config 
!
interface Port-channel 9
 description Uplink to Server47
 no ip address
 switchport
 no shutdown

It’s always good practice to also change the description. Depending on your configuration, you might want to change the vlan settings for this newly created port-channel as well:

S4810(conf)#interface vlan 11
S4810(conf-if-vl-11)#untagged port-channel 9
S4810(conf-if-vl-11)#show config            
!
interface Vlan 11
 description VLAN11-LAN
 ip address 10.11.1.10/16
 tagged TenGigabitEthernet 0/8-13
 tagged Port-channel 1-5,11,13-14
 untagged TenGigabitEthernet 0/14,19-20,23,38,46
 untagged Port-channel 9
 ip helper-address 10.10.10.1
 no shutdown

Of course, depending on the actual network topology, your mileage might vary here.

Note that the port-channel will stay in a ‘down’ state until it can exchange LACPDUs with the remote end:

S4810(conf)#do show interfaces port-channel 9 brief
Codes: L - LACP Port-channel

    LAG  Mode  Status       Uptime      Ports          
L   9    L2L3  down         00:00:00    

2. Configuring LACP on OpenIndiana

First, disable the NWAM (Network Auto Magic) service:

# svcadm disable svc:/network/physical:nwam
# svcadm enable svc:/network/physical:default

To list the available physical ports, use dladm

root@Server47:~# dladm show-phys
LINK         MEDIA                STATE      SPEED  DUPLEX    DEVICE
myri10ge1    Ethernet             down       10000  full      myri10ge1
myri10ge0    Ethernet             down       10000  full      myri10ge0
bnx2         Ethernet             down       0      unknown   bnx2
bnx0         Ethernet             up         1000   full      bnx0
bnx1         Ethernet             down       0      unknown   bnx1
bnx3         Ethernet             down       0      unknown   bnx3

To create an aggregate device with two links (myri10ge0 and myri10ge1) in LACP mode (-L active) with and L2 failover policy (Determines the outgoing link by hashing the MAC (L2) header of each packet), run:

dladm create-aggr -l myri10ge0 -l myri10ge1 -L active -P L2 aggr1

You can use dladm show-aggr to see the current state:

root@Server47:~# dladm show-aggr
LINK            POLICY   ADDRPOLICY           LACPACTIVITY  LACPTIMER   FLAGS
aggr1           L2       auto                 active        short       -----

Next, create an interface aggr1:

root@Server47:~# ipadm create-if aggr1
root@Server47:~# ipadm show-if
IFNAME     STATE    CURRENT      PERSISTENT
lo0        ok       -m-v------46 ---
bnx0       ok       bm--------46 -46
aggr1      down     bm--------46 -46

You should now see that the LACP link is established on the layer 2 switch:

S4810(conf)#do show interfaces port-channel 9 brief
Codes: L - LACP Port-channel

    LAG  Mode  Status       Uptime      Ports          
L   9    L2L3  up           00:00:00    Te 0/32    (Up)
                                        Te 0/33    (Up)

The last thing left to do is to create an IP address on top of the aggr1 interface:

root@Server47:~# ipadm create-addr -T static -a 10.11.20.6/16 aggr1/v4

Again, depending on your topology, you might want to add/edit you default route to go over the aggragate interface.

Setting up an authenticating proxy server with squid3 and pam_auth

While the squid proxy server has quite a few different flavours of authentication available, one of the most basic ones, pam_auth, is also one of the most useful ones to get you started quickly. pam_auth let’s anyone who has a local account access the squid proxy. In large environments you probably want to use ldap authentication eventually, but pam_auth is great for testing purposes.

Let’s install squid3 first:

# yum install squid

A minimal squid configuration file for an authenticating proxy is not too different from the default configuration file that comes with the squid rpm package. The changed parts are hightlighted

#
# Recommended minimum configuration:
#
acl manager proto cache_object
acl localhost src 127.0.0.1/32 ::1
acl to_localhost dst 127.0.0.0/8 0.0.0.0/32 ::1

auth_param basic program /usr/lib64/squid/pam_auth
auth_param basic children 5
auth_param basic realm Squid proxy-caching web server
auth_param basic credentialsttl 2 hours
auth_param basic casesensitive off

# Example rule allowing access from your local networks.
# Adapt to list your (internal) IP networks from where browsing
# should be allowed
acl localnet src 10.0.0.0/8     # RFC1918 possible internal network

acl SSL_ports port 443
acl Safe_ports port 80          # http
acl Safe_ports port 21          # ftp
acl Safe_ports port 443         # https
acl Safe_ports port 70          # gopher
acl Safe_ports port 210         # wais
acl Safe_ports port 1025-65535  # unregistered ports
acl Safe_ports port 280         # http-mgmt
acl Safe_ports port 488         # gss-http
acl Safe_ports port 591         # filemaker
acl Safe_ports port 777         # multiling http
acl password proxy_auth REQUIRED
acl CONNECT method CONNECT

#
# Recommended minimum Access Permission configuration:
#
# Only allow cachemgr access from localhost
http_access allow manager localhost
http_access deny manager

# Deny requests to certain unsafe ports
http_access deny !Safe_ports

# Deny CONNECT to other than secure SSL ports
http_access deny CONNECT !SSL_ports

# We strongly recommend the following be uncommented to protect innocent
# web applications running on the proxy server who think the only
# one who can access services on "localhost" is a local user
http_access deny to_localhost

#
# INSERT YOUR OWN RULE(S) HERE TO ALLOW ACCESS FROM YOUR CLIENTS
#

# Example rule allowing access from your local networks.
# Adapt localnet in the ACL section to list your (internal) IP networks
# from where browsing should be allowed
http_access deny !localnet
http_access allow localhost
http_access allow password

# And finally deny all other access to this proxy
http_access deny all

# Squid normally listens to port 3128
http_port 3128

# We recommend you to use at least the following line.
hierarchy_stoplist cgi-bin ?

# Uncomment and adjust the following to add a disk cache directory.
#cache_dir ufs /var/spool/squid 100 16 256

# Leave coredumps in the first cache dir
coredump_dir /var/spool/squid

# Add any of your own refresh_pattern entries above these.
refresh_pattern ^ftp:           1440    20%     10080
refresh_pattern ^gopher:        1440    0%      1440
refresh_pattern -i (/cgi-bin/|\?) 0     0%      0
refresh_pattern .               0       20%     4320

visible_hostname squid3.yourdomain.com

Since the documentation on squid is quite comprehensive, there’s no need to go into detail. You can also look up individual configuration directives Configuration Reference Manual.

Configuration of the squid PAM authentication helper pam_auth is quite simple. It just needs a PAM service to be configured /etc/pam.d/

#%PAM-1.0
auth            include         password-auth
account         include         password-auth

pam_auth also need the correct permissions to access the user password database, which basically requires it to run as root (path is /usr/lib64/squid/pam_auth on CentOS 6 and /usr/lib64/squid/basic_pam_auth on recent versions of Fedora)

chmod u+s /usr/lib64/squid/basic_pam_auth

Please note, that it’s not recommended to use pam_auth for authenticating to a local unix shadow password database. You should at the very least make sure, that it’s in a directory, regular users can’t access.

That’s it. Now enable and start the squid proxy server:

# systemctl enable squid.service 
ln -s '/usr/lib/systemd/system/squid.service' '/etc/systemd/system/multi-user.target.wants/squid.service'
# systemctl start squid.service

The proxy is then reachable at squid3.yourdomain.com:3128

Resources:
http://zeldor.biz/2013/03/squid3-pam_auth/
See also pam_auth manpage