The Arduino IDE is great for beginners: It makes it really easy to write simple programs without having to care about compiler options, include paths, language standards or how to actually flash firmware onto the microcontroller. It even comes with a built-in serial monitor which can be a great tool for debugging.
Inevitably, as people dive deeper into the world of microcontrollers and the Arduino platform specifically, they usually want more control of the toolchain and use features like referencing source code across different projects and include external libraries. While that’s technically all possible with the Arduino IDE, some of the things might be a bit clunky to set up. IDEs like Eclipse are much more suited for these use cases.
0. Prerequisites
While there are dedicated alternative Arduino IDEs, some of which are actually based on Eclipse such as Sloeber, using the AVR Eclipse plugin is probably the most versatile option. Most distributions (including Fedora) offer a dedicated package in their repositories. Of course, you’ll also need the Eclipse C/C++ Development Tools:
dnf install eclipse-avr eclipse-cdt arduino-core
1. Creating a new C++ Project
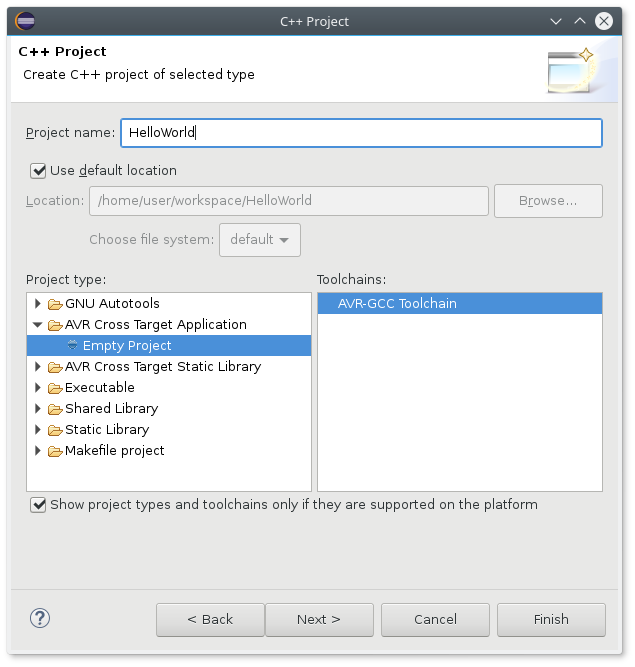
Now that we’ve installed the required packages, let’s start up Eclipse and create a new project (File → New → C++ Project):
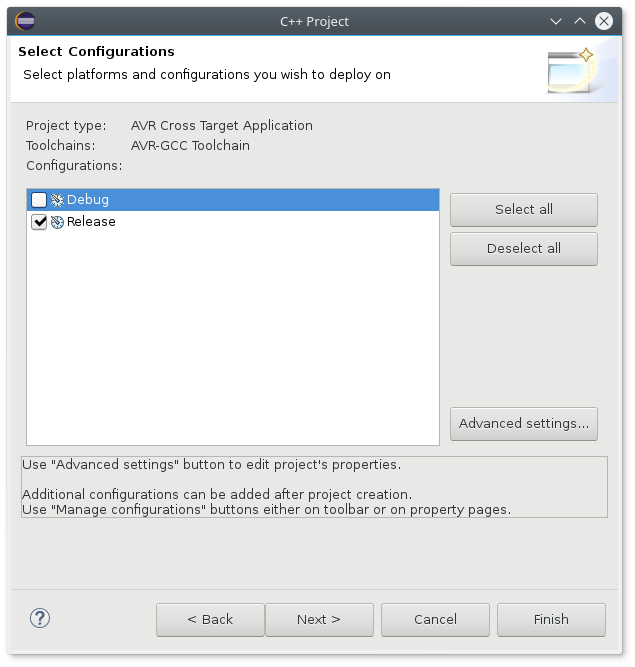
After clicking on Next you can create additional configurations or change the default ones. For the purpose of a sample program we’ll only need a single Release configuration:
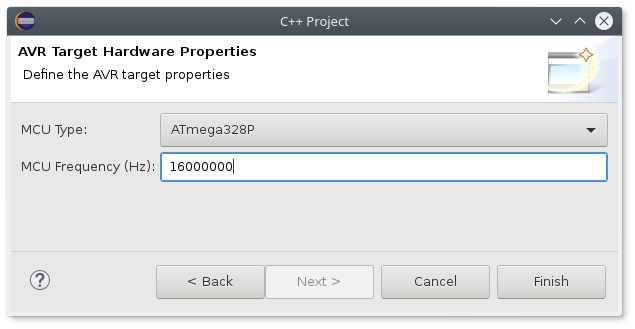
Finally, you’ll have set up the target hardware. For example, the Arduino Uno uses an ATMega328P microcontroller running at 16Mhz:
After clicking Finish the project set up is done.
2. Creating a ‘Hello World’ program
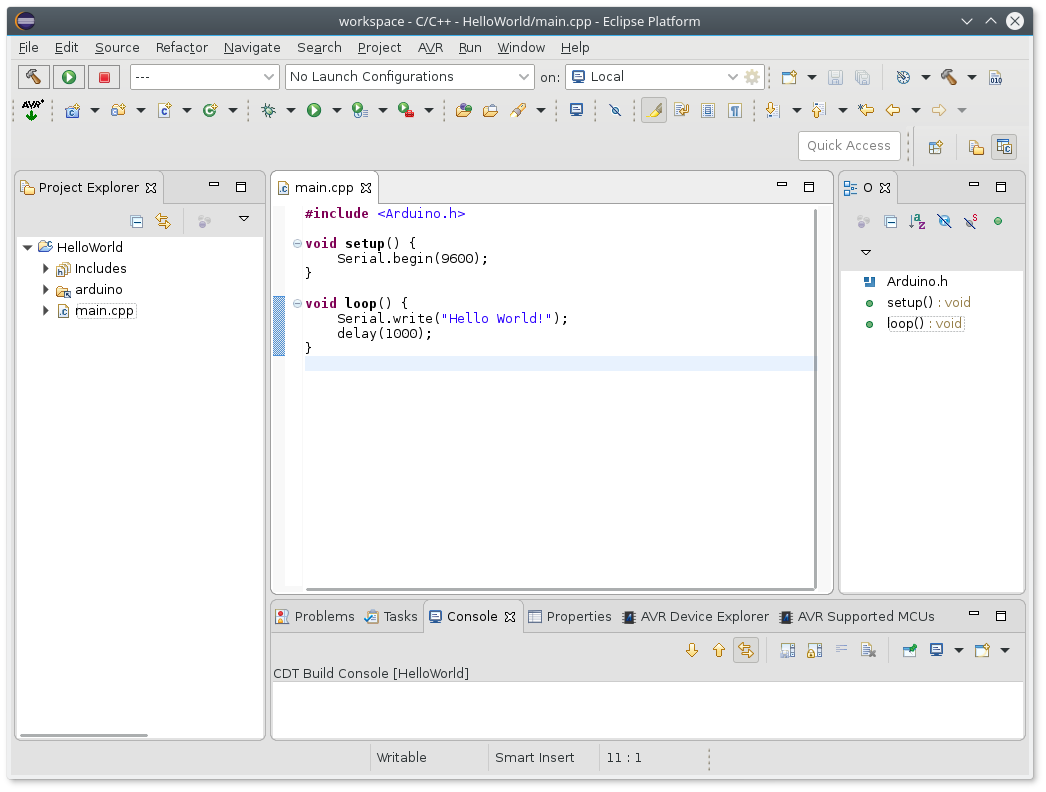
Next, we need to create a file with some actual source code. Click on File → New → Source File to create a new source file (the actual name does not matter) and add the following program:
#include <Arduino.h>

void setup() {
	Serial.begin(9600);
}

void loop() {
	Serial.write("Hello World!");
	delay(1000);
}
Apart from the include statement in the first line, this should look very familiar.
3. Including Arduino specific headers and sources
Now how do we include the Arduino specific code into our project? There’s actually multiple ways to do that. Most resources online (e.g. Francesco Rigoni at Dr. Strangecode) recommend creating some sort of ‘core library’, i.e. compiling the Arduino core project source code once in a separate Eclipse project and then reference that shared library from your other Arduino projects.
The advantage of this approach is that you need to compile the sources only once. However, this ‘core library’ depends on the actual target hardware: it’s compiled for a specific microcontroller running at a specific clock speed. If you change the clock speed or want to deploy your firmware to another Arduino variant with a different microcontroller, you either need another ‘core library’ project or you need to change the parameters of your existing ‘core library’ project (e.g. with an additonal build configuration), potentially breaking things for other projects that use it as a shared library. All in all: A bit too messy and impractical…
An alternative to that approach is linking the Arduino core source tree as another source directory in your eclipse project. If you do change the microcontroller or the clock speed, the Arduino sources are just recompiled along with your own source code. The disadvantage is that compilation takes more time since you’re recompiling the whole Arduino core (or at least the parts that your source code is referencing) along with your firmware. But since that takes just about one second on a modern PC, it could be deemed insignificant.
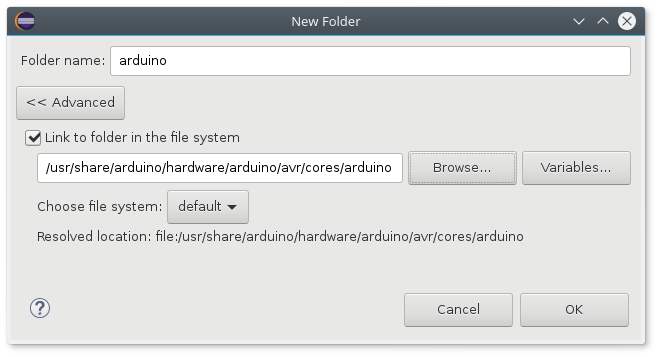
To create a link to an external source location go to Project → Properties → C/C++ General → Paths and Symbols → Source Location → Link folder and create a new link to the Arduino core directory:
The only thing left to do is adding two additional directories to the include directories list so the compiler actually knows where to find the corresponding header files. One is the newly created source location link (which could be a workspace path)
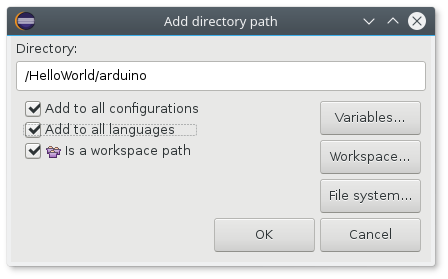
Add the Arduino core directory to include directories via Project → Properties → C/C++ General → Paths and Symbols → Includes → Add
the other one is the directory containing the pin definition headers of your particular Arduino variant:
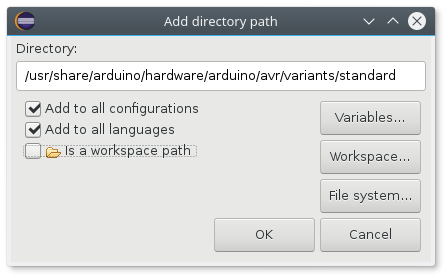
Add the directory containing the Arduino Uno pin definitions to include directories via Project → Properties → C/C++ General → Paths and Symbols → Includes → Add
Now you should be able to compile your project.